Polygon Bridge Deep Dive: How to Choose and Use It
If you have ever tried to interact with decentralized finance (DeFi) or trade NFTs on Ethereum during a bull run, you know the pain. Gas fees skyrocket, making small transactions financially impossible. This is where scaling solutions come into play, and Polygon is arguably the most popular destination for users fleeing high costs. But to enjoy those near-zero fees, you first need to move your assets there. You need a polygon bridge.
A bridge acts as a connector between two separate blockchains. Since Ethereum and Polygon are distinct networks with their own rules and consensus mechanisms, they cannot natively “talk” to each other. The bridge allows you to port your liquidity from Layer 1 (Ethereum) to the sidechain (Polygon) securely. Once bridged, you can use the same tokens you love—like USDT, DAI, or ETH—but within the high-speed, low-cost environment of the Polygon ecosystem.
In this guide, we will break down the mechanics of bridging, the different types of bridges available, and how to execute a transfer without losing your funds.
Disclaimer: This content is for educational purposes only and should not be taken as financial advice. Always DYOR (Do Your Own Research) before interacting with smart contracts or bridging large amounts of funds.
What is Polygon Bridge?
At its core, the polygon bridge is a trustless, bidirectional transaction channel. It allows users to transfer tokens back and forth between the Ethereum Mainnet and the Polygon network. When people talk about “moving funds,” they usually aren’t physically moving a token from one server to another. Instead, the bridge changes the state of your assets so they become usable on the destination chain.
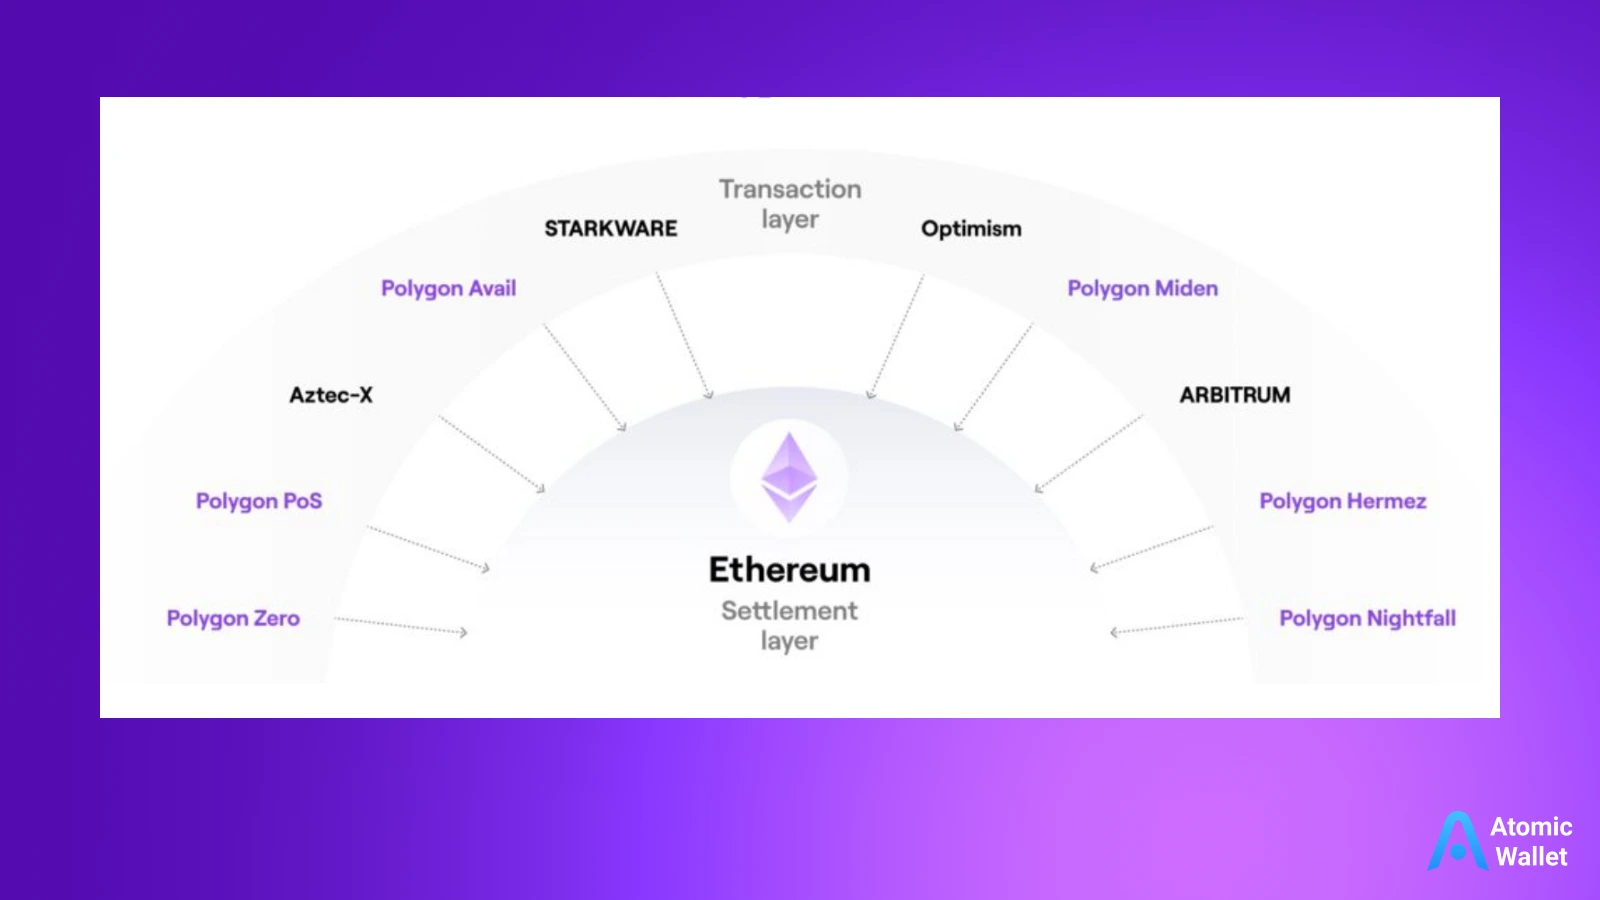
The demand for polygon crypto interactions has grown massively because Polygon acts as a commit chain to Ethereum. It bundles transactions and submits them to Ethereum, inheriting much of its security while offering a throughput that Ethereum currently cannot match.
PoS Bridge vs. Plasma Bridge
It is important to note that Polygon actually offers two official bridging methods, and knowing the difference can save you time and money:
- The PoS Bridge (Proof of Stake): This is the most commonly used bridge. It is secured by a set of external validators. It is significantly faster for deposits and offers a flexible exit period (usually 20 minutes to 3 hours). It supports most ERC-20 tokens, including usdc polygon, and ETH.
- The Plasma Bridge: This bridge relies on the Plasma exit mechanism, which provides increased security guarantees rooted in the Ethereum mainnet itself. However, the trade-off is speed. While deposits are fast, withdrawing funds from Polygon back to Ethereum via Plasma can take up to 7 days due to the challenge period. This is mostly used for the native POL token.
How does Polygon bridging work?
If you want to master cross-chain operations, you need to understand the “Lock and Mint” mechanism. Blockchains are isolated ledgers; they cannot read each other’s data by default. Bridges solve this by using smart contracts on both chains to maintain a 1:1 peg of your assets.
Here is the simplified lifecycle of a bridging transaction:
- Locking on Ethereum: When you initiate a transfer, you aren’t sending tokens to Polygon directly. You are sending them to a smart contract on Ethereum. This contract “locks” your tokens in a vault. They are taken out of circulation on Ethereum but are still safe in the contract.
- Minting on Polygon: Once the Ethereum transaction is confirmed, the bridge validators signal the Polygon network. A corresponding amount of “wrapped” tokens (e.g., PoS-WETH or bridged USDC) is minted and sent to your wallet address on the Polygon network.
- Burning to Exit: When you want to go back to Ethereum, the process reverses. You “burn” (destroy) the tokens on Polygon. The validators verify this destruction and then “unlock” the original funds from the Ethereum vault, releasing them back to your wallet.
This mechanism ensures that the total circulating supply remains constant across both networks, preventing inflation.
Choosing the right Polygon bridge
Not all bridges are created equal. While the official bridge is the standard, the crypto ecosystem has evolved to offer third-party “liquidity bridges” (like Hop Protocol, Connext, or Synapse) and Centralized Exchange (CEX) bridges.
Official Polygon Bridge
The official bridge is generally the safest route for large amounts because it lacks the liquidity risks of third-party protocols. However, it can be slow, especially for withdrawals back to Ethereum, which require checkpointing.
Third-party alternatives
Third-party bridges often use liquidity pools on both sides. They don’t wait for the underlying blockchain checkpoint; they just swap your funds instantly from their own reserves. This is much faster and cheaper for withdrawals, but it introduces an extra layer of smart contract risk.
Here is a quick comparison to help you decide:
Step‑by‑step bridging walkthrough
Let’s walk through the practical process of moving usdc polygon (USDC) from Ethereum to Polygon using the standard PoS bridge. This is the most common workflow for DeFi users.
Prerequisites
Before you start, ensure you have a secure Polygon wallet set up to manage your assets. You will also need enough ETH on the Ethereum Mainnet to pay for gas fees. If you are starting from scratch, you can buy Polygon or ETH directly with fiat to get started.
How to Bridge Polygon
- Navigate to the official Polygon Bridge interface.
- Click to connect your wallet. Select “WalletConnect” and scan the QR code using your Atomic Wallet app. This establishes a secure connection between your device and the bridge.
- In the interface, ensure you are on the “Deposit” tab. Choose the token you want to bridge (e.g., USDC) and enter the amount.
- If this is your first time bridging usdc polygon, you will need to sign a “Token Approval” transaction inside your Atomic Wallet. This gives the bridge permission to access your USDC.
- Click “Transfer” A popup will show you the estimated gas fees and time (usually 7-8 minutes). Review the details and confirm the transaction securely within your Atomic Wallet interface.
- Once the transaction is mined on Ethereum, you have to wait for the bridge validators to sync. You can track the progress on the dashboard.
- Once the process is complete, you can view your bridged balances directly in your Atomic Wallet. Your USDC will appear on the Polygon network, ready to be used.
Polygon bridging playbook recap
Bridging is the gateway to modern DeFi. By understanding how the polygon bridge functions, you unlock a world where transactions cost pennies rather than dollars. Whether you choose the official PoS bridge for maximum security or a third-party liquidity layer for speed, the mechanism remains a fundamental part of the crypto infrastructure.
Remember that bridging involves interacting with smart contracts, so always double-check the URL you are using. With your assets now safely managed in your Atomic Wallet on the Polygon network, you are ready to explore yield farming, NFT trading, and gaming without the friction of Ethereum’s mainnet costs.